
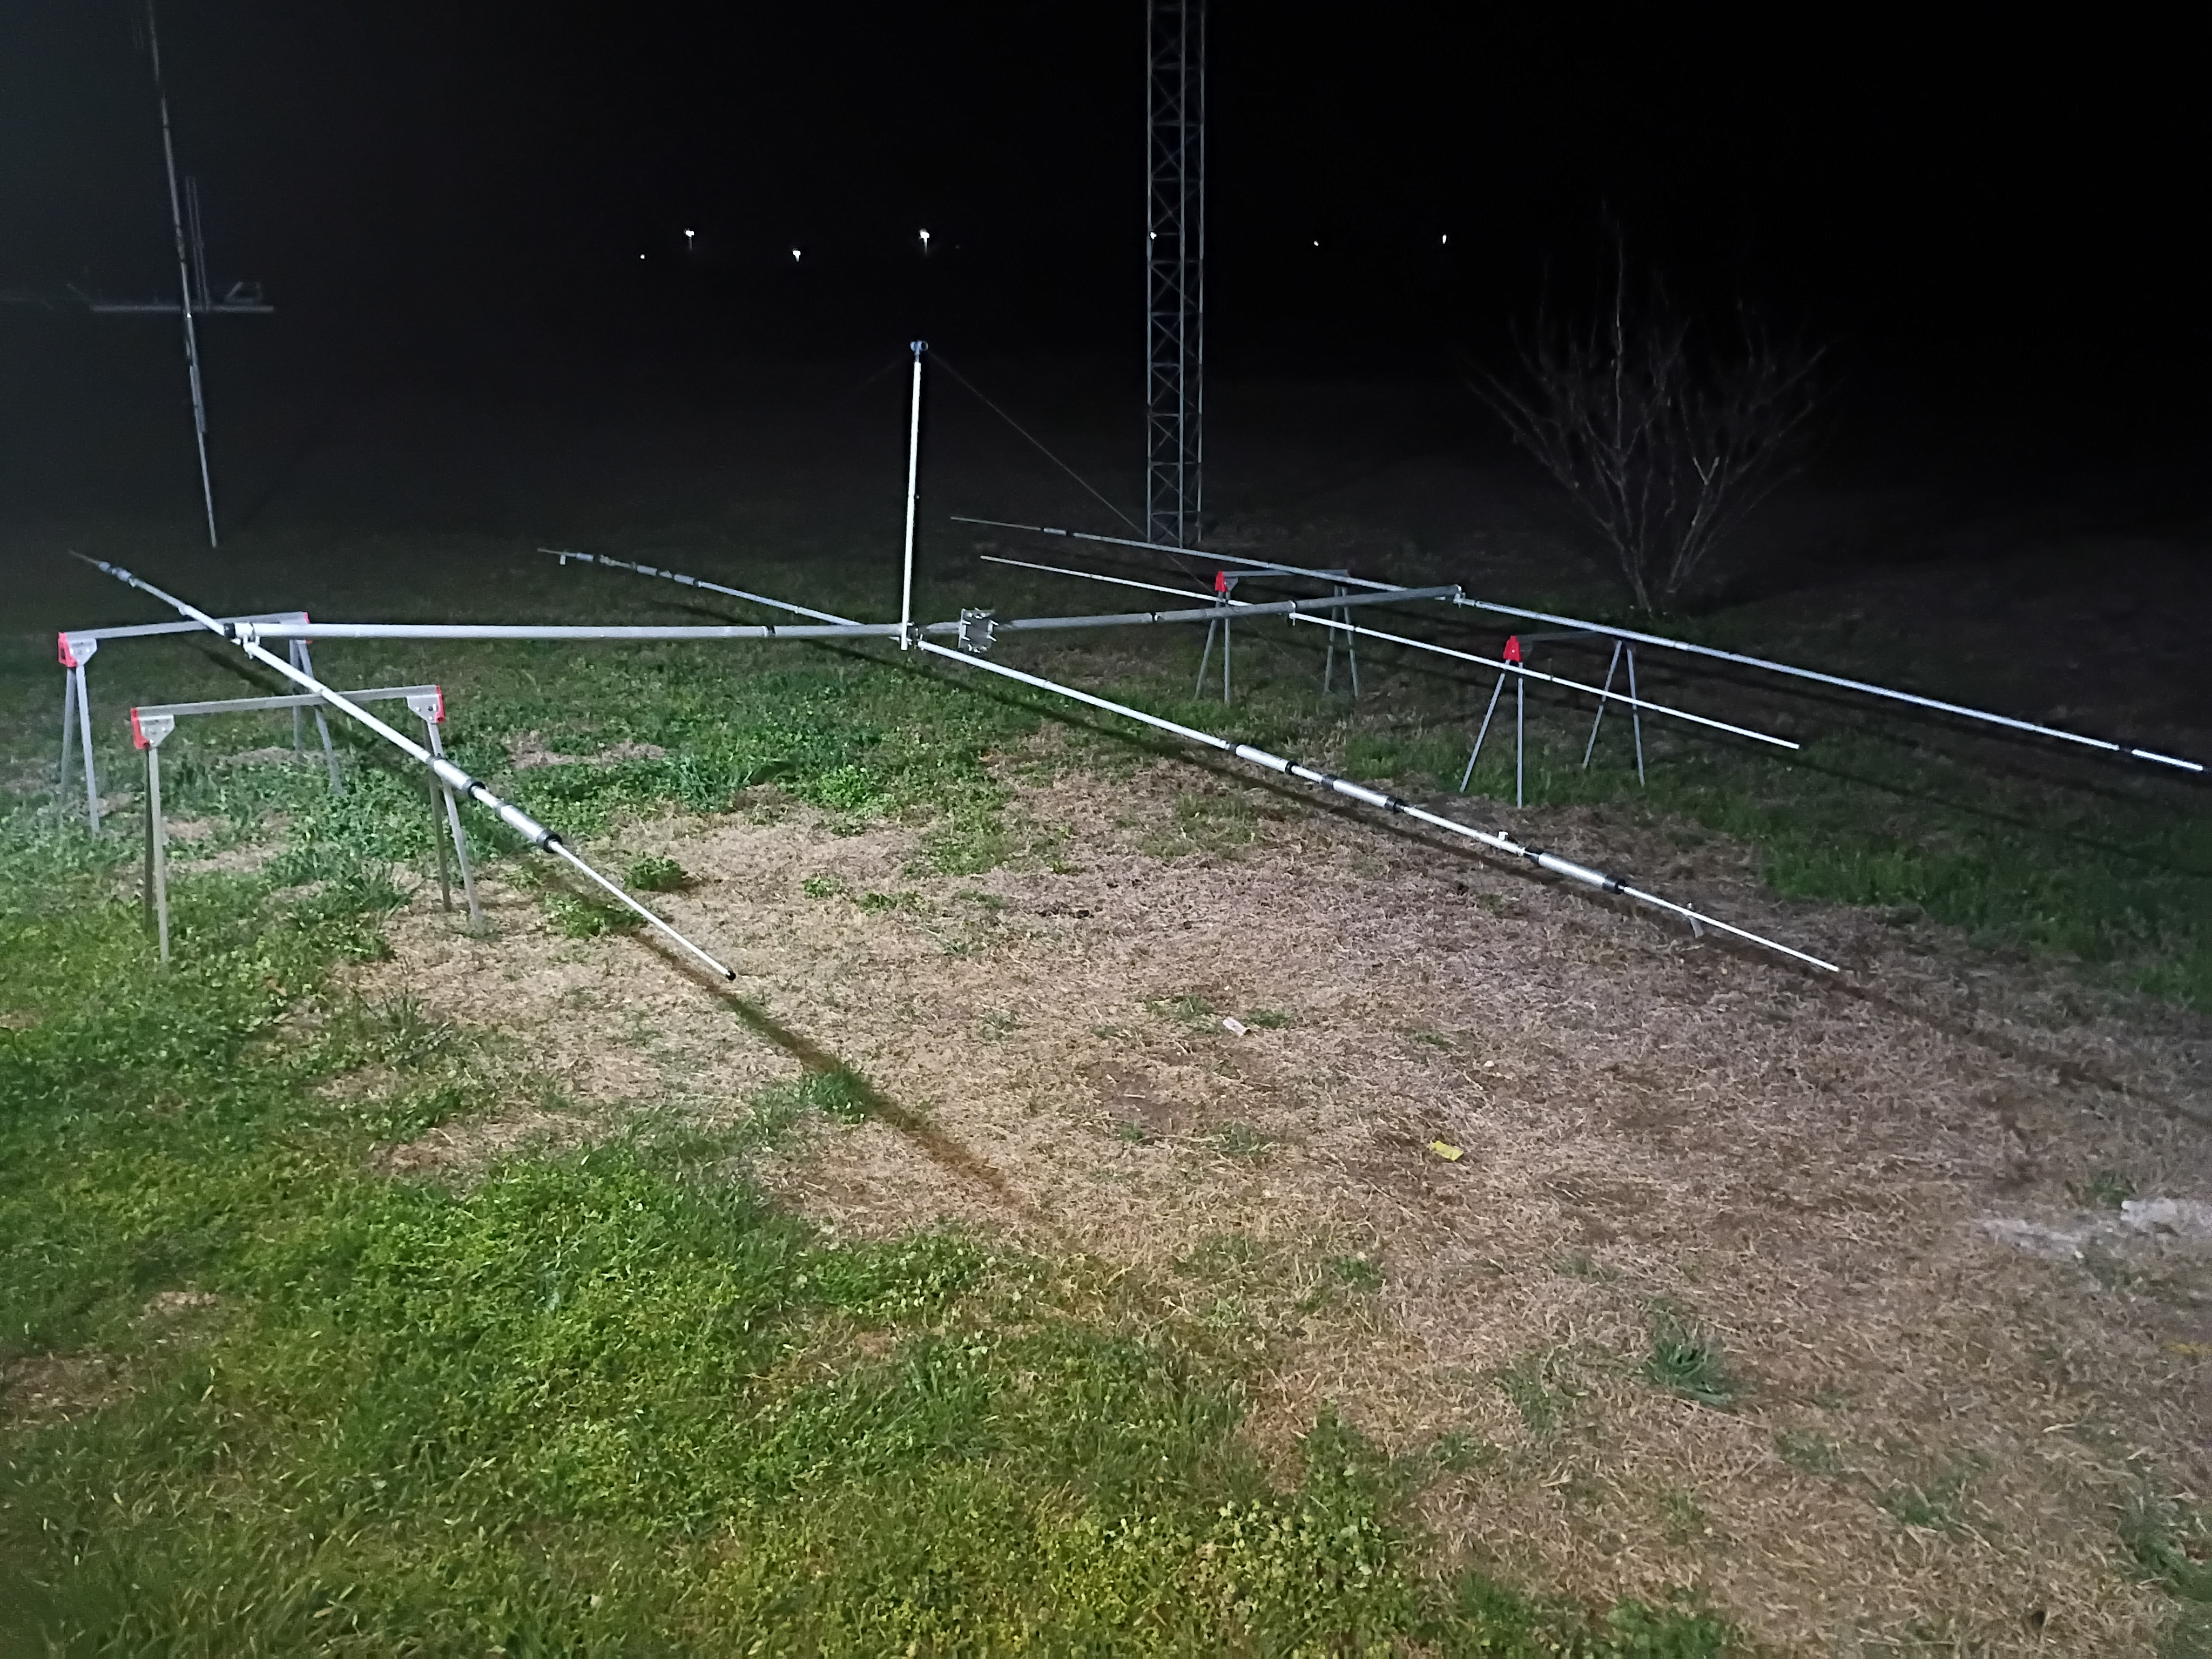
Last month I was working on my old Cushcraft A4S antenna trying to finally get it up in the air and making gain. When I first assembled the antenna I had 4 frequency resonances, but they were all WAY off from where I expected them to land. I had a resonance at 8 something Mhz instead of 10Mhz, and then scattered around the sort of near the bands on 20m and 15m with one odd-ball resonance in the 12m band.
Obviously I had some problems with my antenna. I immediately suspected the traps as the issue, mostly since the traps a the only part of the antenna that is something other than just a simple aluminum pipe. I took the antenna down from it’s temporary mount and put her on some sawhorses and started taking it apart.
I pulled all the traps off the antenna and started testing them. Just started simple with a good-ole 4 wire Ohms measurement using my HP 3478a bench multimeter. I figured these traps were just a coil of wire with a aluminum tube covering them and acting as a capacitor, the “C” portion of the traps’ LC circuit. As such I would expect very low resistance values of < 0.5 Ohms or so. Most were well below that but there were a couple which measured in the low single digits. There was even one trap that was completely open circuit. How I missed that during the first tests I’ll never know!
Even so, I ran all the traps through my tracking generator/spectrum analyzer setup to see where they resonated. Most were acceptably close to the expected frequency but some of them were off enough to be adjusted, and one of the TC traps (I forgot which one) was over 500khz too high in resonance. I was very worried I would break the traps when I tried to get into them. I have always looked at traps like they contained some kind of black magic. Not the normal magic smoke that everything else is full of, antennas and traps in particular are full of some really mysterious forces. But then I talked to the service tech at MFJ. It wasn’t so much the words he said, it was his attitude. He wasn’t scared. He wasn’t intimidated by the dark forces at work inside antenna traps. He had climbed the mountain to the temple of forbidden knowledge and realized when he got there that it was just a waffle house. His exact quote was something like:
“Just take the traps apart and adjust them. They’re just aluminum tubing and wire. There’s nothing magical in there.”
So I decided they would ALL get opened up and cleaned and inspected. I was going to pull up my big boy pants and go in there among the unknowns. I didn’t catch a lot of pictures during the process of opening the traps, but it is fairly well documented on the internet. Now that I have had them all open I have ZERO fear of doing this in again in the future.
So when you remove the dust caps from the trap you’ll see a screw connection on one end. Remove it.
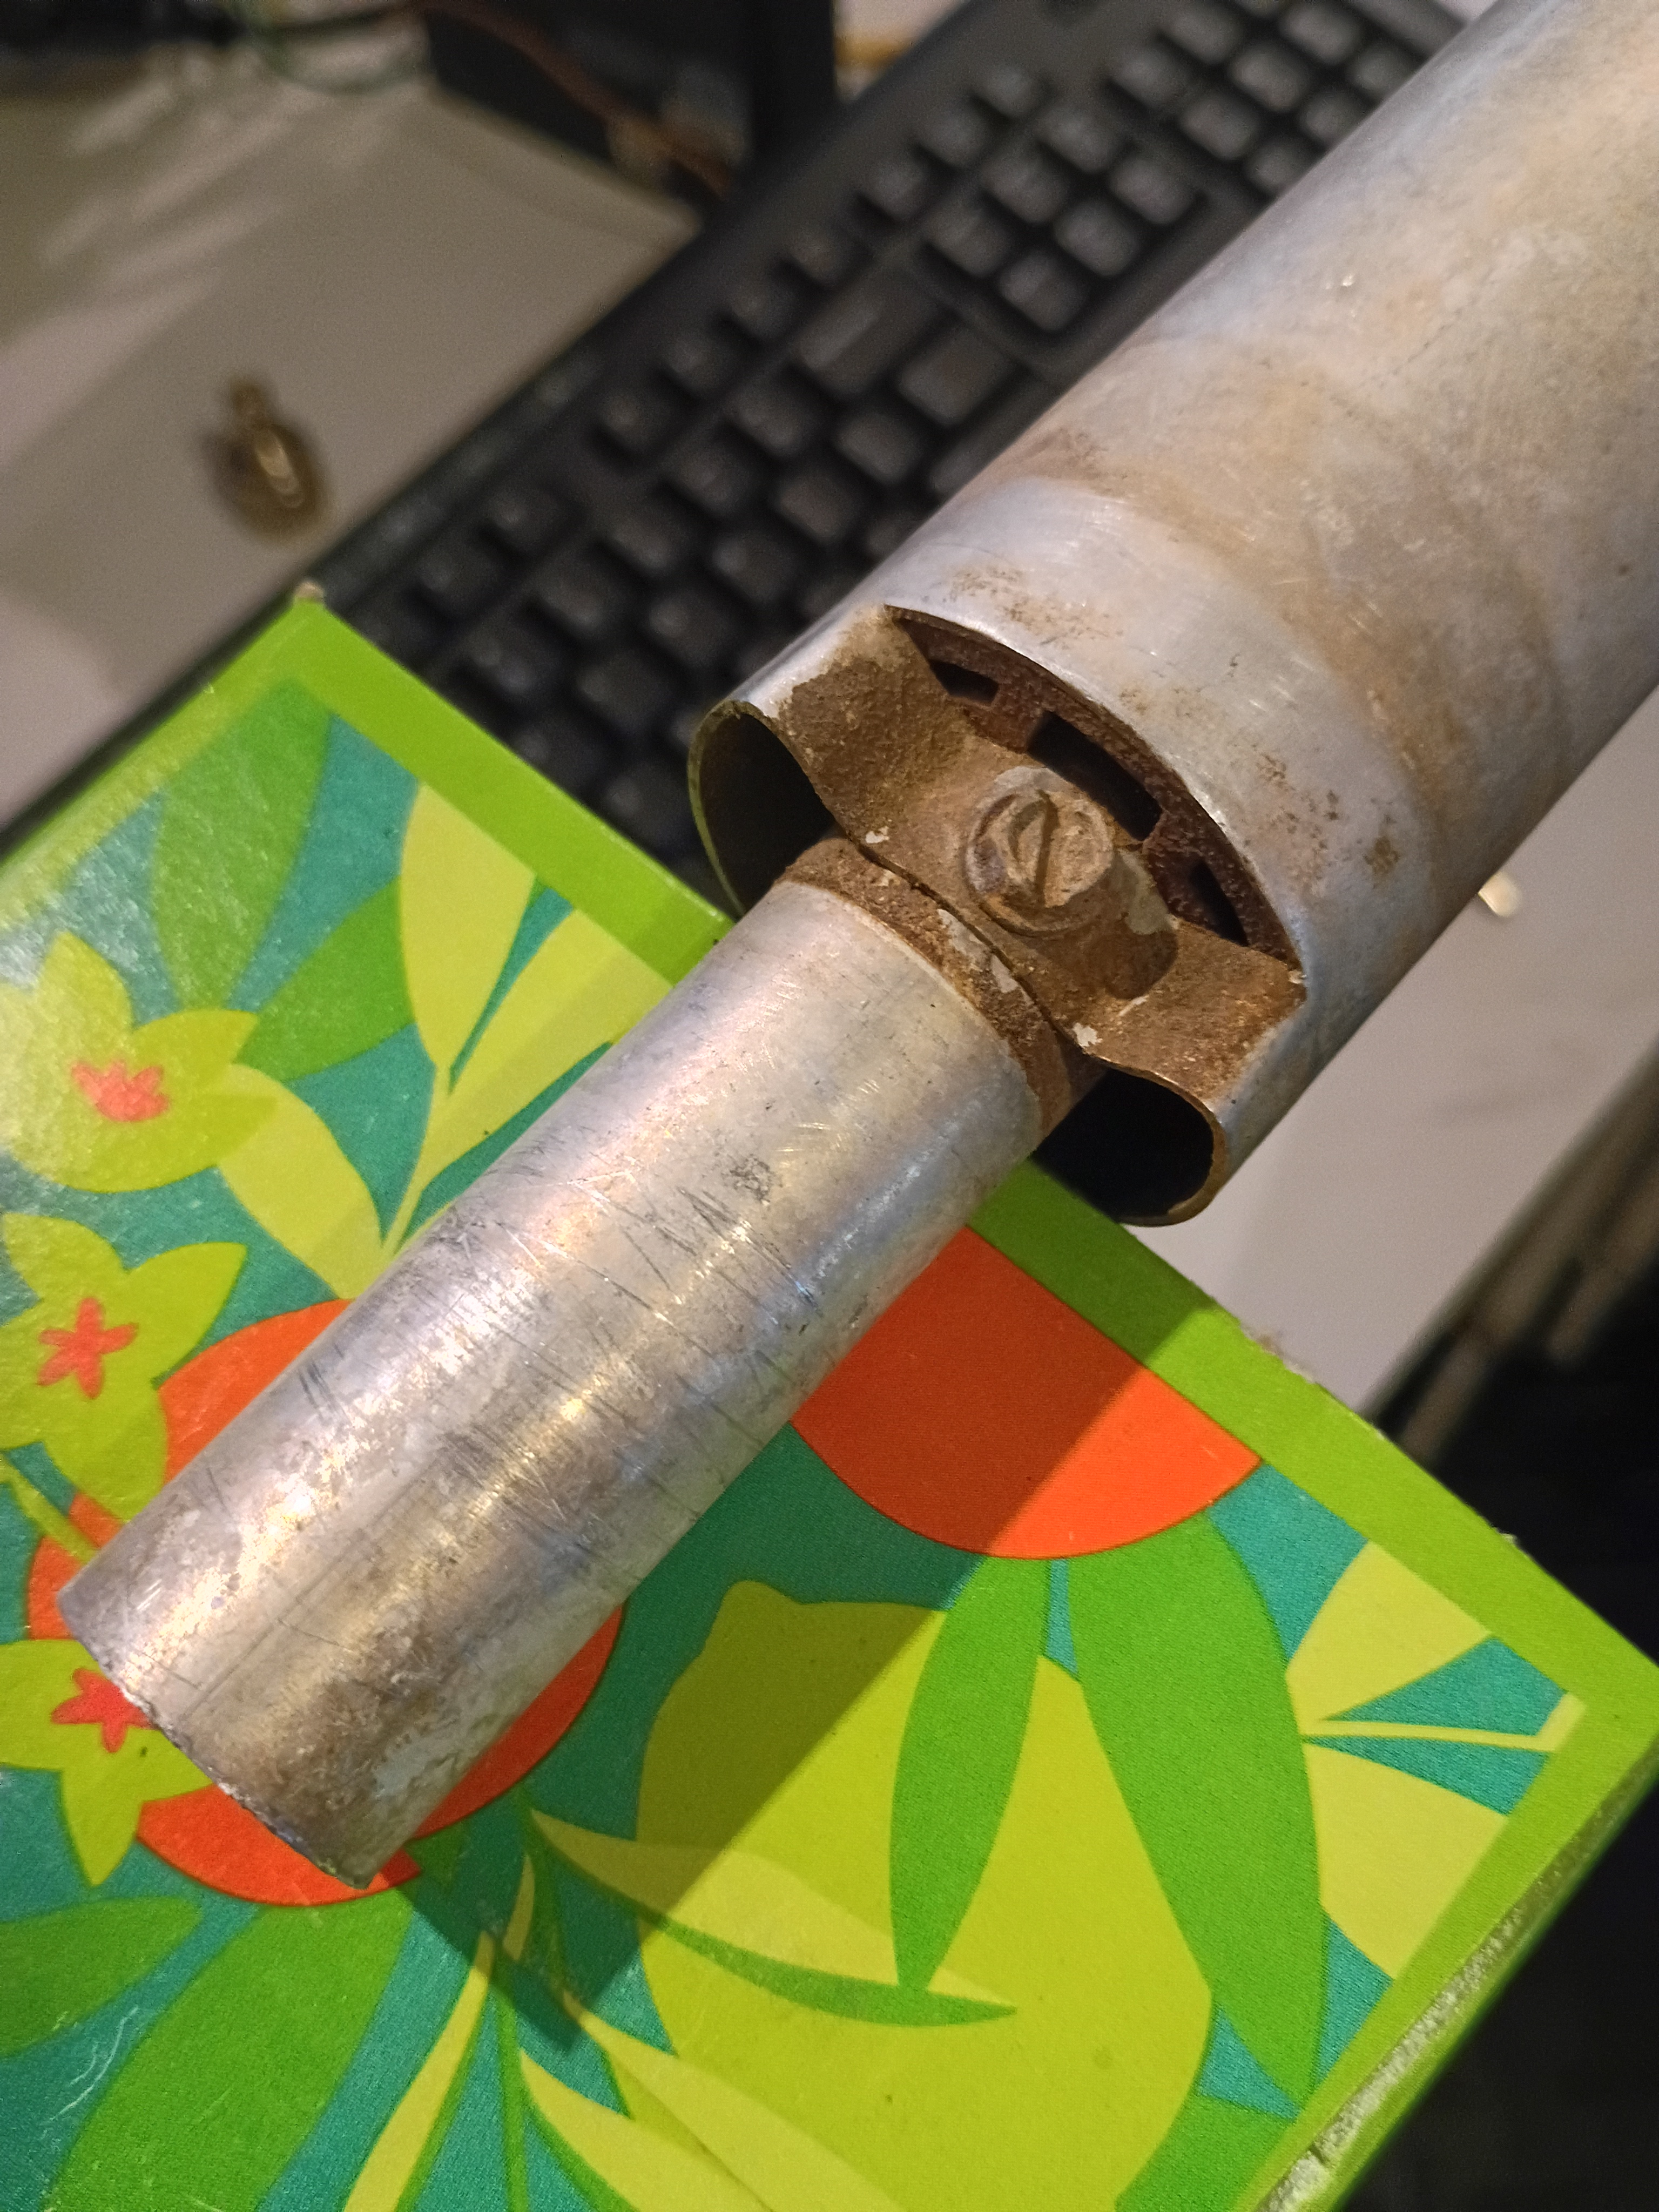
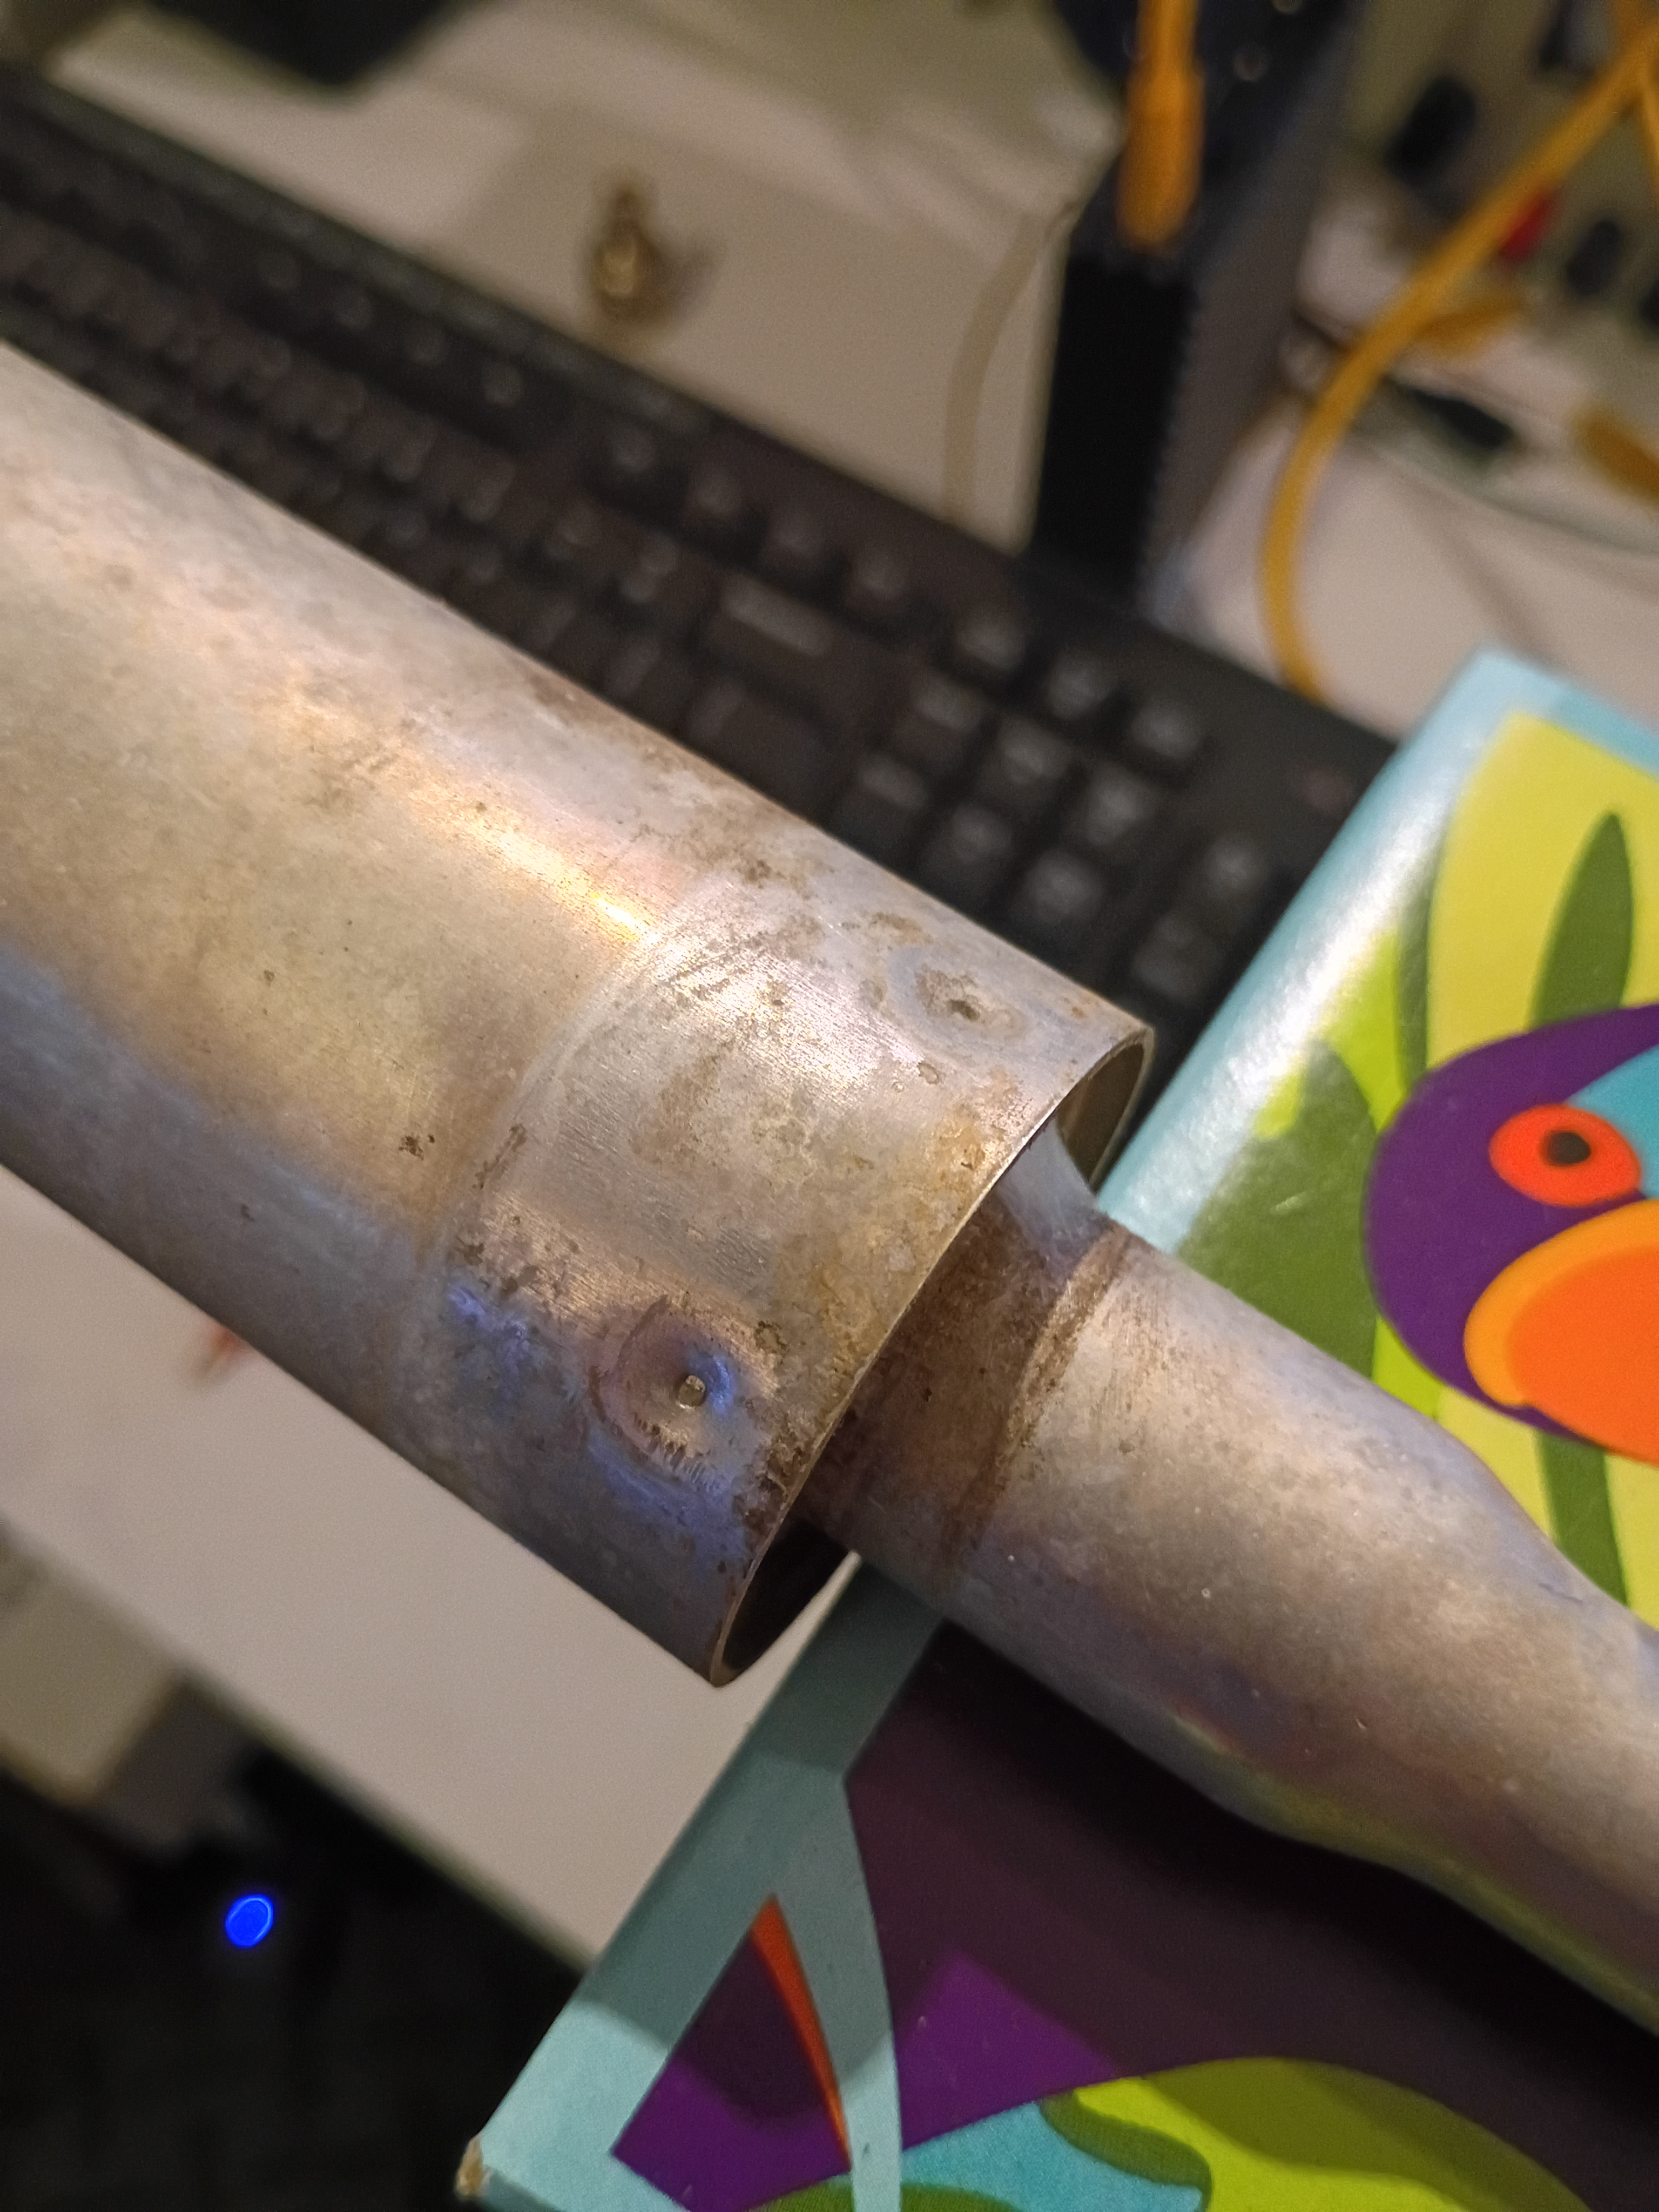
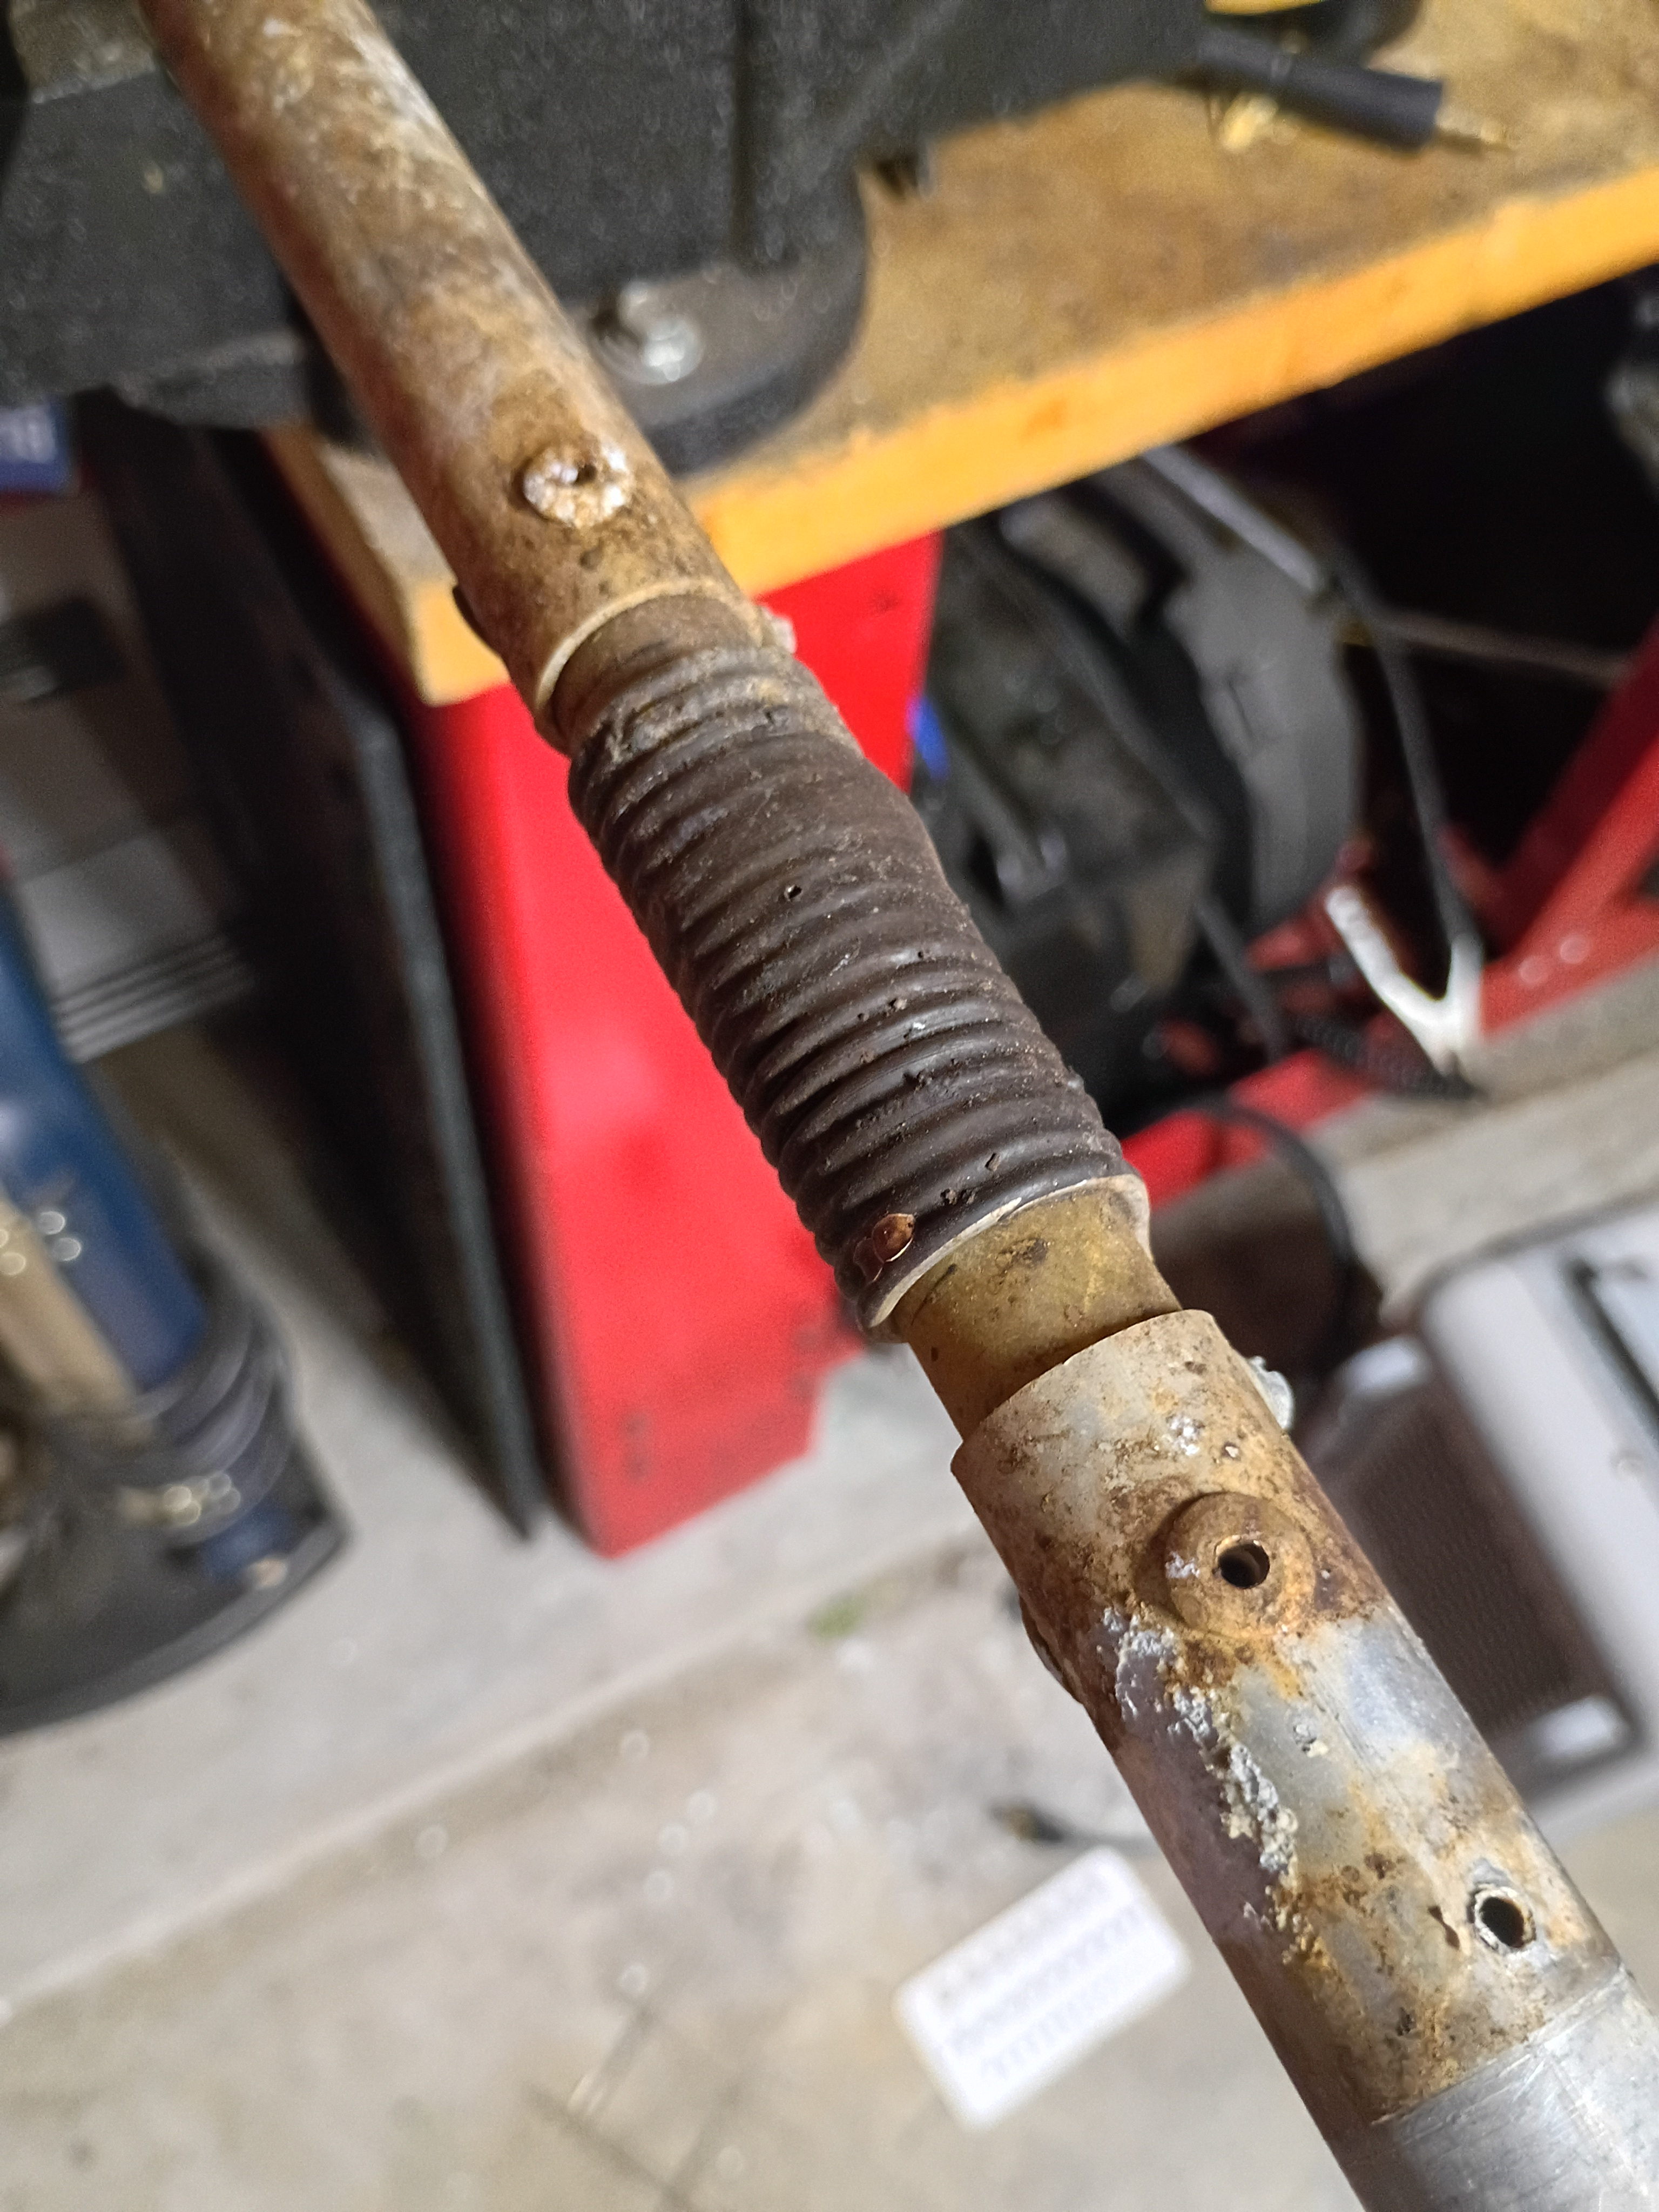
And some dimples stamped into the other end…
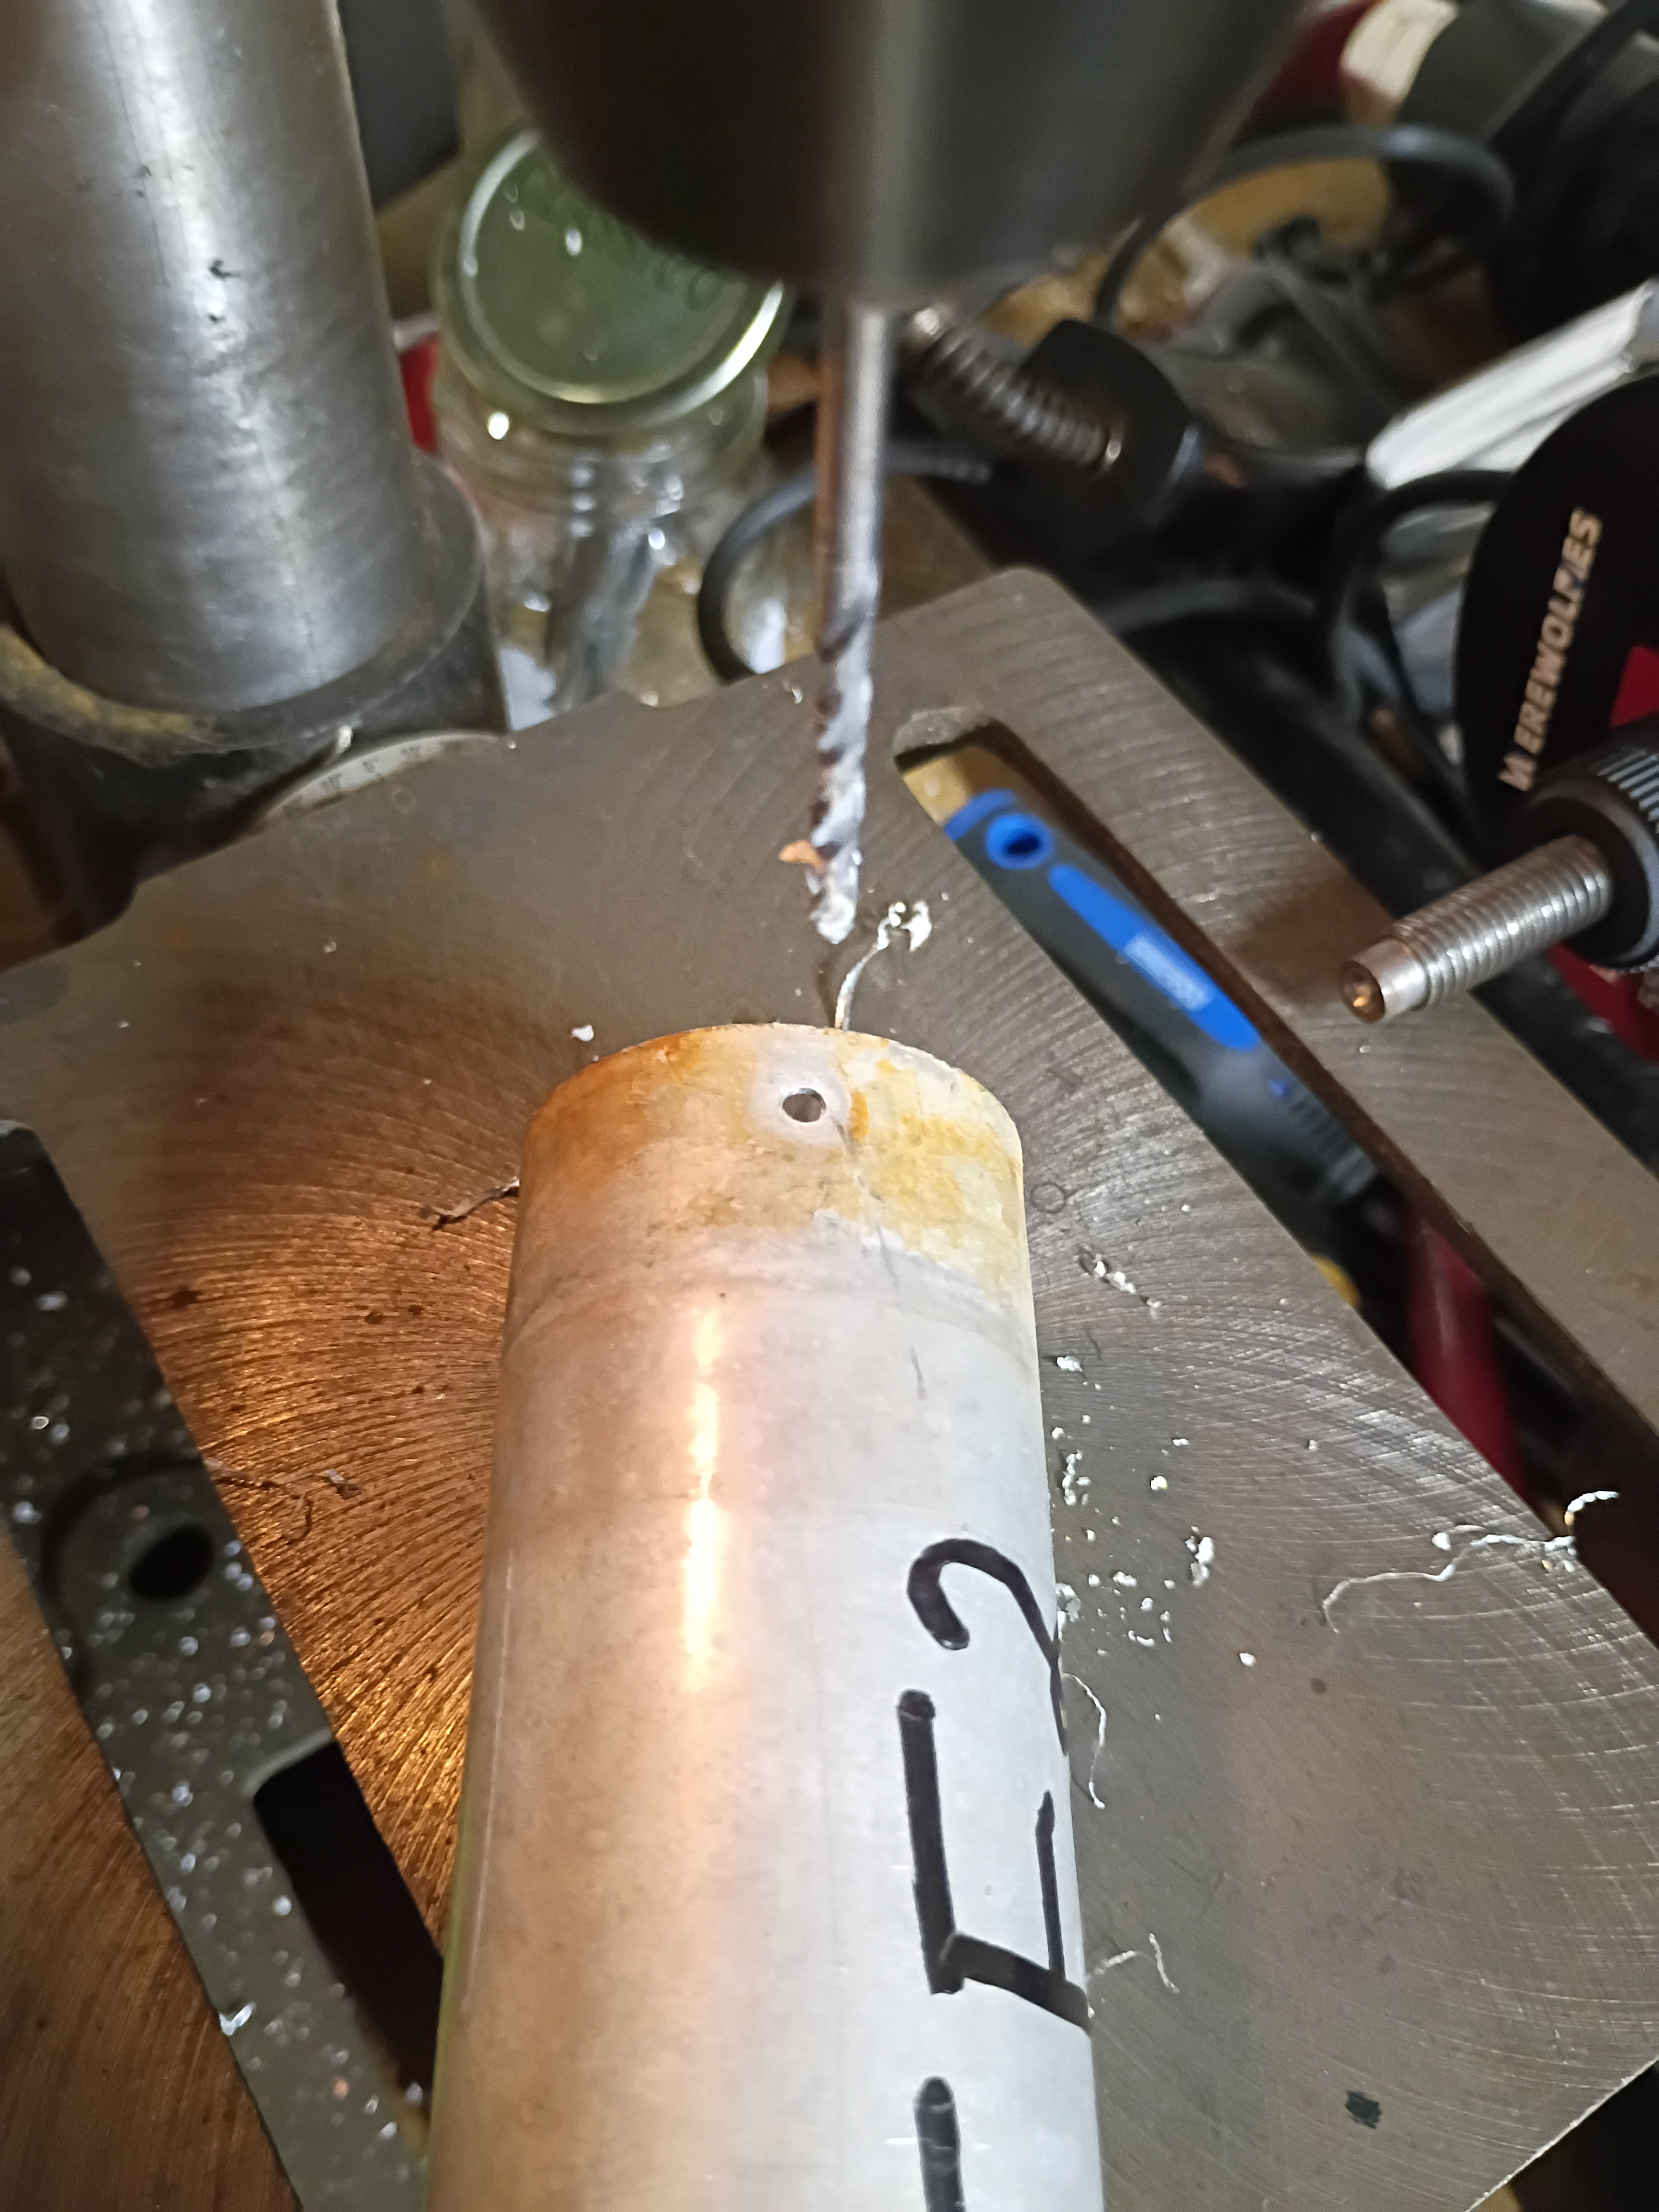
Mount up your drill press and a 1/8″ bit and drill out the dimples. Only go barely through the aluminum, there’s no need to drill a deep hole.
Then I clamped the dimples end of the trap in my bench vise and gave the capacitance tube mighty yank while sounding my barbaric “YAWP”. It was a fairly sturdy yank, and sometimes I had to give it a couple of tries, but eventually you’ll strip the capacitance tube off the coil and you’ll be rewarded with some seriously dirty and gross coils.
I grabbed a wire brush and some 1″ sandpaper roll and got to work. I scrubbed up the tubing and cleaned gently-ish the coil. I removed the screws securing the end of the coils and sanded both mating surfaces. Then reinstalled the screws and smeared some dielecric grease on all the mating surfaces and stuffed everything back onto the trap. There are 3 little white donut spacers that center the coil inside the cap. Make sure those get cleaned and put back in place. One of them is located at the very end where the dimples were placed. I didn’t worry about re-dimpling or anything. Also, pro-tip, I just replaced all the 40 year old plastic dust caps with a couple of inches of 2″ Marine grade heat shrink tubing. It worked great and was only $7 for 4 feet of tubing.
The last trap, the TC that was out of spec was really full of bugs and leaves, but still needed adjustmenteven after cleaning. I simply did what the MFJ tech suggested; I slid the capacitance tubing back and forth along the trap until the reading was where I wanted it and then ran a new screw hole to mount it. He said that’s how they were adjusted at manufacture. He said there was a meter there showing the resonance in real time. The worker just slid the cap around until it was right, then ran self-tapper into it. Again, I was creating mystery when the answer was actually really simple.
After cleaning and adjusting all the traps I re-ran them through my test setup and all the traps were right where I wanted them!! This picture is representative of what I saw, nice clean dip in the trap right where I expected it. I did find that the heatshrink tubing dropped the resonance about 20-40khz. I don’t know if the original dust caps did the same, but I’ll take it. All the traps were well within spec and the heat shrink does a much better job of sealing up the traps.

Once all the traps were finished I re-assembled the entire antenna on some sawhorses in the back yard. Once complete again, I went over all, and I do mean ALL the measurements in the Cushcraft documentation. I aimed at the “Center of band” measurements, and I was very meticulous about getting everything just right. At the end of all the adjustment I didn’t have a single dimension on this antenna that was more than 1/4″ off over a span of 30-ish feet. I double checked everything was tight and triple checked all my work.
Now it’s time for SWR measurements, tuning, and finally installation. A little teaser, I checked the SWR and I indeed have a triband antenna! There’s quite a story to the SWR tuning, but that’s for next month!
73
Ken AC0TG

Leave a comment